The CMS is very flexible and largely because it contains an editor as well there are many ways you can link to a file from your content. Below are some of these methods:
Link from Within Editor Content
From any CMS management tool that contains the WYSIWYG editor you can easily create links and those links can be to existing files. The key thing to understand here is that there is no way to upload these files within the editor as there is with images. From the Content manager there are other ways to upload file that we will discuss later but if you wish to use the editor to link to a file just understand that you must have already uplaoded this file so that it can be managed within the Media Manager.

Linking to an existing file is really just creating a link within the editor. Position and type the text of the link you wish to create in the editor and then highlight this test and click on the link icon in the second row of the editor toolbar.
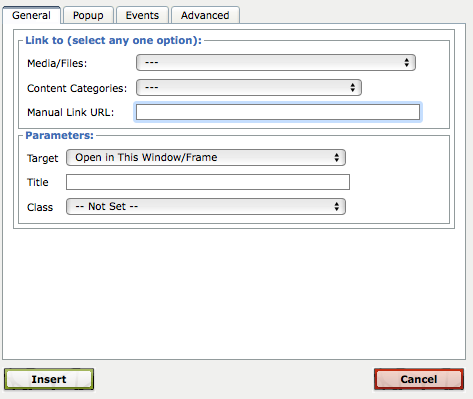
Then the link dialog will be shown where you may create the actual link. You will be shown a pulldown menu of all Non-Image Media content, a pulldown menu of your existing Content Categories and a place where you can enter a URL. While you could link to the file from the URL shown to you in the Media Manager detail view that is more complicated and so you should just find the file in the Media/Files pulldown menu.
After you have selected this file the title will be filled in from the Name field but you can change it if you wish. Click Insert to create the link or Cancel to leave the link system and the highlighted text as it was originally.

Link to Media Files from the Content Manager
From within the Content Manager you can create a link to a file quite easily but with less flexibility. In the Linked Media Files segment you can simply choose any already uploaded file or files and they will be shown using the Name field as the link text below the Content Article. You may choose to order these file links by name or uploaded date ascdening or descending.
To do this:
- Open the Linked Media Files Segment from the article you wish to link from.
- Click on the Media & Upload button.
- You will now be presented with Quick Media Manager system which is a bit less powerful than the full Media Manager.
- Select the files you wish to link to - you may click as many as you wish. You may use the search features to help find these files. Selected files will show as highlighted but as you change pages you may not see every file selected any longer.
- You may also click "Upload New File" to upload a file not already in the Media Manager.
- Click Close Media Browser when you are through selecting files.
- You will now see the files you have selected. From this panel you cannot remove files until you have saved the article but upon future editing you can simply click on a file to deselect it and no longer link to it.

Link to Entire Categories of Media Files
These least flexibile option but certainly the easiest is to link from the Content Manager to a category of Media files. From within the article you wish to link from simply click on the Linked Media Categories segment and you will see a list of all available Media Categories. Simply click to select all of the categories you wish to link to and how you wish these files to be ordered (Name or date ascending or descending). The ENTIRE list of files in those selected categories will now be shown below the article.
This is a great way to link to a group of files and easily manage them as even if you add or removes files in a Media Category in the future the current group wil always be linked from the article.