QR Code
OWT CMS and LMS Documentation Site       https://cms.owt.com

How to Display the last modification date for page content

If you wanted to display, automatically, the date a particular article was last modified you can enter the following in the editor:

Last Modified: [[Calc;modified]]

Generally you would do this at the end of the content as we have done below.


Last Modified: 11/20/2024


How To Edit An Existing Article

To create an article in an existing category that is in a level that is setup to show administrative edting prompts the easiest way to create a new article is to:

  1. Login to the Admin Center as an administrator
  2. Navigate to the category as a normal site visitor would. 
  3. Look for the Edit Content link and click on it.
  4. Make your changes (usually in the Brief)
  5. Click Update. 

If the site level hides administrative prompts right click on the content area to reveal the Edit Content link. 

The manual way to accomplish this is to:

  1. Login to the Admin Center as an administrator. 
  2. From the Content segment select the Content button.
  3. From the Category menu on the right select the category you wish to edit. 
  4. Find the article you wish to edit or even use the search tools to find it. Click on the article you wish to edit. 
  5. Make your chagnes (usually in the Brief) 
  6. Click Update.

Using Reveal Answer Text

Amex Multi 4 Vert 84x220

How many credit cards do you see in the graphic?

There are 4 credit cards. 


Reveal AnswerThis is done easily by using the "Reveal Answer" style.   
  1. Add the graphic. Left Justify it (in this example)
  2. Add the question text. 
  3. Add the answer text.
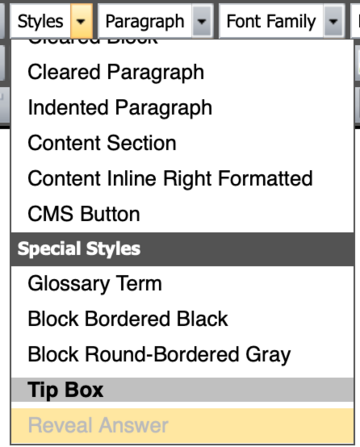
  4. Highlight the answer text and from the Styles menu pulldown to "Reveal Answer" 

How To Create A New Article In A Category

To create an article in an existing category that is in a level that is setup to show administrative edting prompts and has no existing articles the easiest way to create a new article is to:Create Content Link

  1. Login to the Admin Center as an administrator
  2. Navigate to the category as a normal site visitor would. 
  3. Look for the Create Content link and click on it.
  4. At a minimum type a headline and some content in the Brief.  
  5. Click Save. 

If the site level hides administrative prompts right click on the content area to reveal the Create Content link. 

If there are existing articles in this content category:Edit Content Link

  1. Login to the Admin Center as an administrator
  2. Navigate to the category as a normal site visitor would. 
  3. Look for and Edit Content link and click on it.
  4. From the edit panel for the article you clicked on click Cancel. This will leave you with the correct category selected. 
  5. Click the New Article button at the bottom of the content listing. 
  6. At a minimum type a headline and some content in the Brief.  
  7. Click Save. 
  8. You now may need to drag your article to the correct order you wish to have for the articles as the newest article will be ordered first by default. 

The manual way to accomplish this is to:

  1. Login to the Admin Center as an administrator. 
  2. From the Content segment select the Content button.
  3. From the Category menu on the right select the category you wish to edit. 
  4. Click the New Article button at the bottom of the content listing. 
  5. At a minimum type a headline and some content in the Brief.  
  6. Click Save. 
  7. You now may need to drag your article to the correct order you wish to have for the articles as the newest article will be ordered first by default. 

How To Replace An Already Uploaded File

Image Title: The Select File button in the Asset panel of the Media record.
The Select File button in the Asset panel of the Media record.

If you have already uploaded a file in the Media Center and linked it to an article but need to replace that file with a revised version and do not need to change the filename:

  1. Login to the Admin Center as an Administrator.
  2. From the Content segement select Media.
  3. Locate the file you wish to replace using the search and/or navigation tools in the Media Manager. 
  4. Click on the file you wish to change.
  5. Click on the Select File button and locate the new file on your computer. 
  6. Click on the Update button. The file will be replaced but the filename will be the same.  All articles that link to this file will now link to the new version. 

NOTE: If you have years or versions etc. indicated in your filename and you replace the file with a different version it will STILL have the old filename.  We suggest for files like this that when you first create the Media entry and upload the original file you think carefully and rename the file on your computer to something generic.  For example if the file on your computer was "2018 Order Form.pdf"  rename the file to simply be "Order Form.pdf" and then the Media manager will upload the file as "OrderForm.pdf" (spaces and most non-alphanumeric charcters are removed).  Then next year when you are ready to upload "2019 Order Form.pdf" you can just replace the file as detailed above and it will still be "OrderForm.pdf" on the website.  

This is a critical concept to understand.  Media Entries have a field for Name which can be anything and can be changed at anytime. The field for Filename however is taken from the filename on the computer that uploaded the file and can NEVER be changed.  You can, of course, delete a file but you cannot change the filename on the server. 

How to Insert Clip-Art into an Article

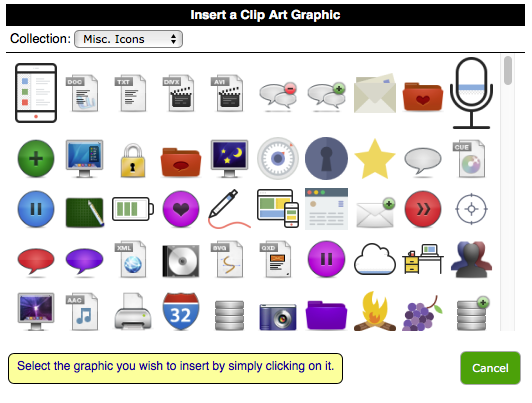
The CMS comes with an extensive library of clip-art and you may even add to this library by designating a Media Category with the Clip-Art attribute.  To add one of these clip-art graphics to your article:

  1. Edit or create an article as you normally would.
  2. From either the Brief or the Article select the Clip-Art icon as shown in the graphic.
    Clip-Art Editor Icon
  3. Select a Collection from the pulldown menu.
  4. When you wish to select a graphic simply click one time on that graphic. 
  5. The image is now added at the editor point just like any other inline graphic and may be resized, aligned or even deleted normally. 

How to Create An Article That Can't Be Viewed by the Public

For whatever reason you may want to work on an article and be able to preview how it will look but not allow non-administrators view this content. For this purpose we offer "Draft Mode".

To create an article like this go to the Content Manager and search for the Content Category you wish to add this article to.  Now click the New Article button. (You could, of course, take an existing article and convert it to a draft if you prefer - just edit that article instead of creating a new article). 

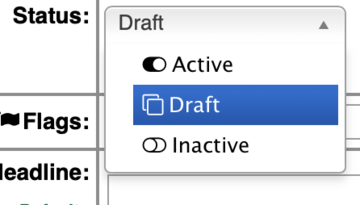
You will notice the first feature on the New Content window is "Status" in the form of a pull-down menu.  Click on this menu and select "Draft" from the options. 

Now, at a minimum, add a headline for this article and probably some other content as desired.  Click Save when you are ready to save the article. 

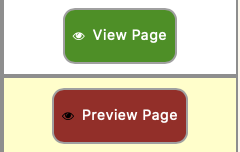
Normally administrators can preview most content by clicking on the View Page button from the Content Manager listing view.  Drafts will show this button as "Preview Page".  The only way for anyone to view this page is to click on this Preview Page button so only administrators will have access to this feature.  

Preview Page Button